Preparing Birch Plywood Plates
I learned a lot by hanging my work in front of customers this past weekend. There were few customers so I ended up staring at my work for hours. (Those who know me also know that sitting still for hours at a time does not come easily to me. My mind will be racing at a million miles an hour if I’m forced to do it.) I started wondering why my results were so inconsistent. Some of them are under-inked and show “too much” wood grain. Others are over-inked and lose some of the fine details. How can I keep details while preventing the image from being dominated by woodgrain? Well, I took to the Internet and found some things to try.
First, the wood itself. I realized last week that scrap wood from the local mill isn’t going to work very well. The quality of the wood is inconsistent. This means differing amount of hardness, porosity, resin content, and more. Each of these factors, and probably more, can affect the way that the plate responds to ink. As I read more and more information from folks who have some experience, there seem to be two main types of wood that they use. Shina is the best. It’s a plywood from Japan that’s created specifically for woodblock printing. It’s also expensive. Second best seems to be A1 grade Baltic Birch plywood, which I can get from my local lumberyard. Most folks seem to use 3/4″ for printing. I’m going to try 1/2″ because my plates are small so warping is less of an issue. Thinner wood will also give me more flexibility in terms of the press that I acquire. Presses with more clearance are more expensive.
So, with that decision made, it’s time to learn about preparing the wood for printing. First, I learned a lot by asking them to make the initial cuts at the lumberyard.
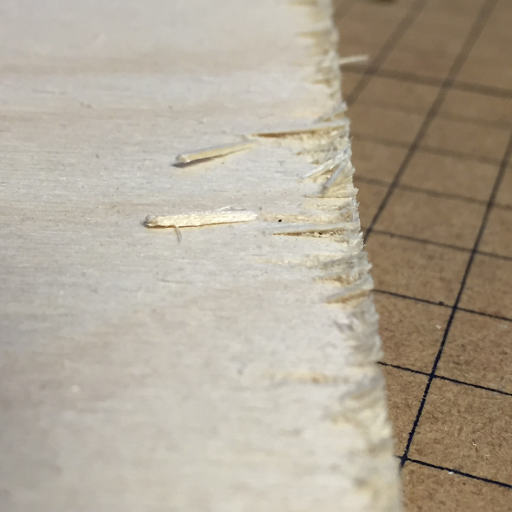
[Torn up edge]
The cuts that they made were AWFUL! Thank goodness that the torn up edge is all on one side so I can decide that this side is the back. In the future, I’ll bring home full sheets and cut them up myself.
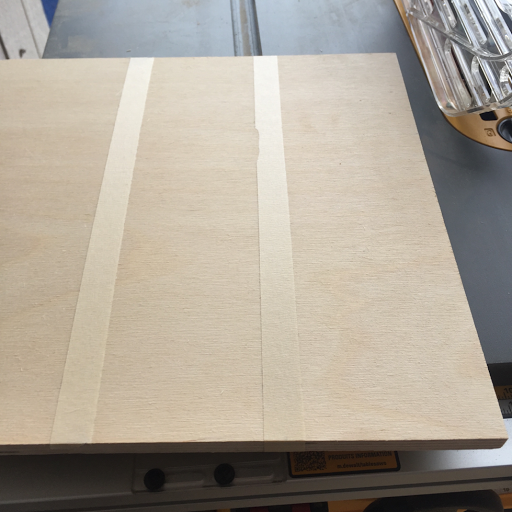
[taped for safety]
I remembered an article that I read months ago about how to make tablesaw cuts without tearing the wood. First, replace the blade. I bought one with 90 teeth instead of the 24 teeth I was using. This means that each tooth is removing less wood. Then, stick down some masking tape to the cut line on the side that needs to be perfect. Stick it down as hard as possible so that it holds the surface in place and prevents it from tearing.
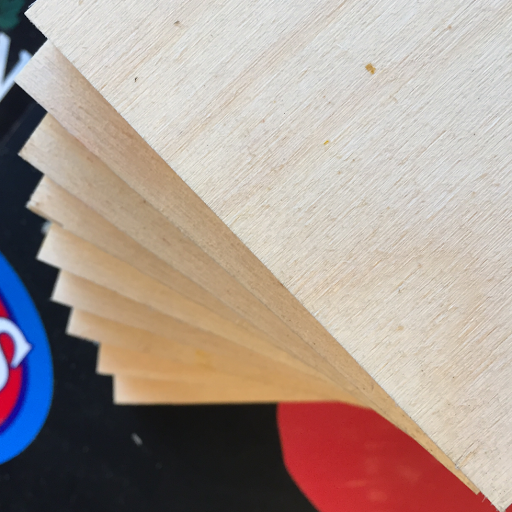
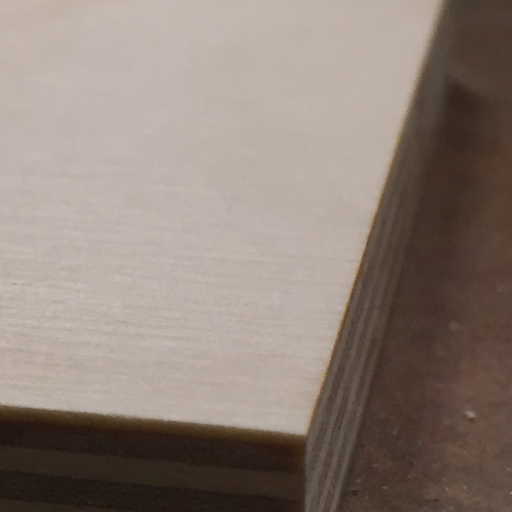
[crisp, untorn edges]
It worked! Between the new blade and the masking tape, my edges are absolutely perfect.
The next step to prepare the wood for ink is to sand and seal it. I used the belt sander at 120 grit for the first pass. This removed the deep surface grain of the birch. I sealed the surface with shellac. It’s real shellac with an alcohol base. This does two things – the alcohol doesn’t raise the grain as much as the water of a water-based varnish would and the shellac itself will not soften on contact with oil-based ink or solvent. Shellac is supposed to lead to a smooth, less splintery, less ink-permeable surface.
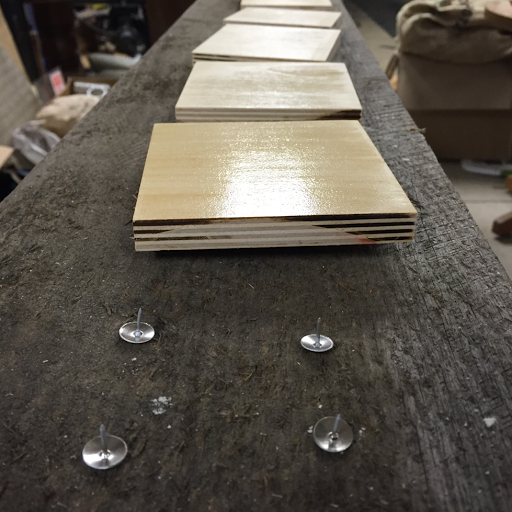
[both sides shellacked at once]
There is a trick to applying the shellac, though. First, I set out thumbtacks to put the plate on after coating. Then, shellac the back, shellac the front, and set it on the tacks. If only one side was coated, the plywood could have a tendency to warp, even from the tiny amount of swelling on the coated side. Shellacking both sides at once keeps the wood from warping.
I used two thin layers of shellac and sanded with 220 grit in between them.
[satin smooth, ink-impermeable surface]
The results is satin-smooth with an edge that glows, telling me that the shellac did penetrate into the first 1/32″ at least. It feels great to my (clean) fingers. I can’t wait to see how it carves and inks!
I want to give a shout-out to the website that brought much of this information into one place: https://letterpresscommons.com/wood-cut/. Thanks so much for providing these tips so that maybe I can get better results without having to just experiment for myself.
Sorry, the comment form is closed at this time.