December 25, 2015
In
Uncategorized
Filofax Punch Registration Jig
Today I started the process of developing a very accurate registration jig. It’s based on a hole punch left over from the days before smart phones. I was obsessive about my Filofax organizer, printing my own custom pages and punching them to fit it.
The point of a registration system is to make sure that the paper and the printing block end up in exactly the same relationship to each other for multiple print passes. The previous system that I tried was reliant on the paper and the block being perfectly square. With 6 holes, the paper really can’t shift. I will just need to ensure that the holes are straight and it will all be good.


[filofax hole punch]
This is an example of the sort of thing that makes me thankful for months of experience with the tools and techniques of CNC carving. I decided that, rather than lots of fiddling with a drill press and dowels, I can just carve exactly what I want from a single piece of wood. I just need to take careful measurements to translate from the physical punch to the theoretical design to the physically carved board. Here are a couple of tests. On the right you can see some carved holes to ensure that my circles lined up with the real punch holes. They did so I went on to the second test, carving away the background to make a set of pegs that line up with the punch holes.
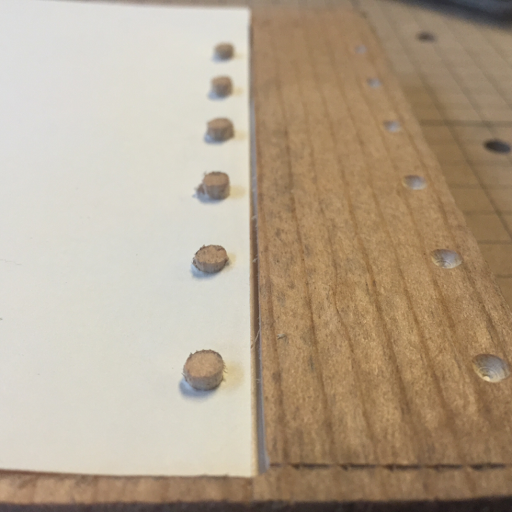
[registration hole tests]
The next problem I ran into is that my paper cutter is off from square. Therefore, when I line up the punch to the bottom side, the edges are crooked.

[crooked paper]
The real answer is to upgrade my paper cutter since the one I have was salvaged from the trash and cannot be adjusted at all. For now, however, I can angle my paper to compensate for the crooked blade.
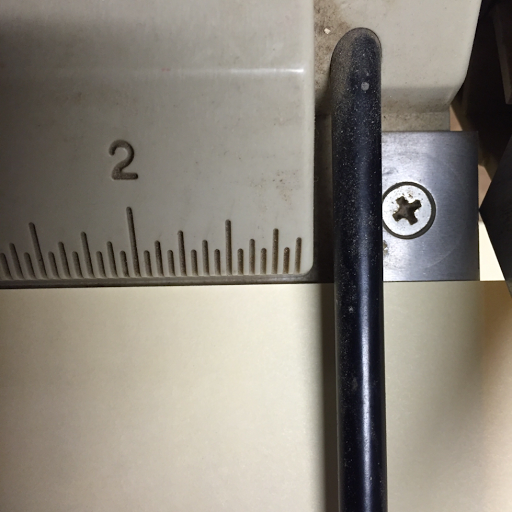
[compensating for out-of-square cutter]
After solving the problem of square paper, I was out of time for a real print test, but I couldn’t help but run a test pass through the press and use the embossing to verify that everything was registered correctly.
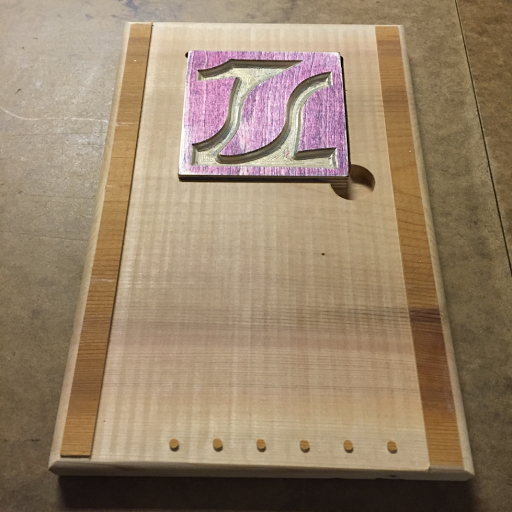
[the whole jig]
[corner snugged into place]
It worked fine so tomorrow I can go ahead and run some tests with ink.
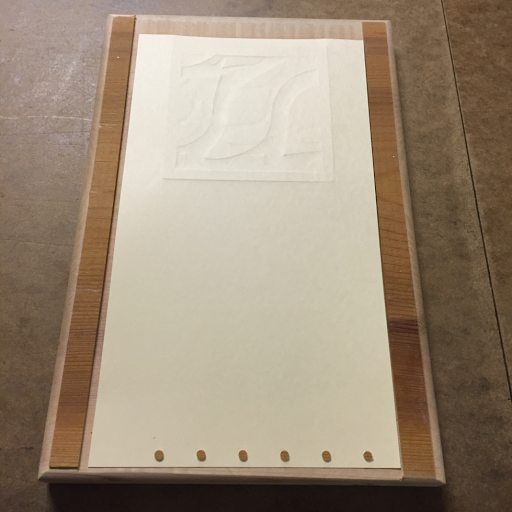
[jig with paper]
Notice how the original board isn’t square? The pegs are nothing like a standard distance from the bottom edge. That’s totally OK. The board was set so that the left and right edges were perfectly square to the cutting grid. All of the relationships between the components have to be correct because they were cut by the computer and not by the untrustworthy hand that had cut that off-square board to begin with.
Sorry, the comment form is closed at this time.